They are easier to use in softwoods like white pine, spruce or fir, as harder woods like oak, cherry, walnut and yellow pine tend to bend them before they are driven fully home. You will have some luck nailing some of the softer hardwoods. For instance basswood is soft enough under most circumstances to be successfully nailed. You can also nail the harder hardwoods, but you must pre-drill the nail holes first, giving the nails a path to follow into the wood without splitting or bending.
In old houses, you will sometimes find square forged nails holding together oak full sized 2 x 4s.Those nails were driven into green wood in which the cells were still soft and pliant, allowing the nail to enter. Once the wood is dry, the nails are held fast. And you would never be able to pound those nails into fully seasoned oak.
Here's a rule of thumb on selection of the right nail to fit the job:
A nail should be long enough so that over half up to 2/3rds of it's length goes through the first board into the one to which it is being attached. For example, to nail through 1/4 in. thick stock and to attach it to another piece of wood, the ideal length of nail would be 5/8 in. to 3/4 in. Nails longer than that tend to go astray, and shorter than that may give insufficient holding power. Of course the exception to this rule is when nailing two boards flat to each other, in which case the nail should be selected so that it does not go through both boards.My youngest students like to just glue things together, but that tends to give a fragile joint. Some students on the other hand, love the challenge of nailing things together, even at odd angles, but often nails are made more effective if the wood is also glued. I sometimes have difficulty getting my students to do both. Effective nailing requires effective observation.
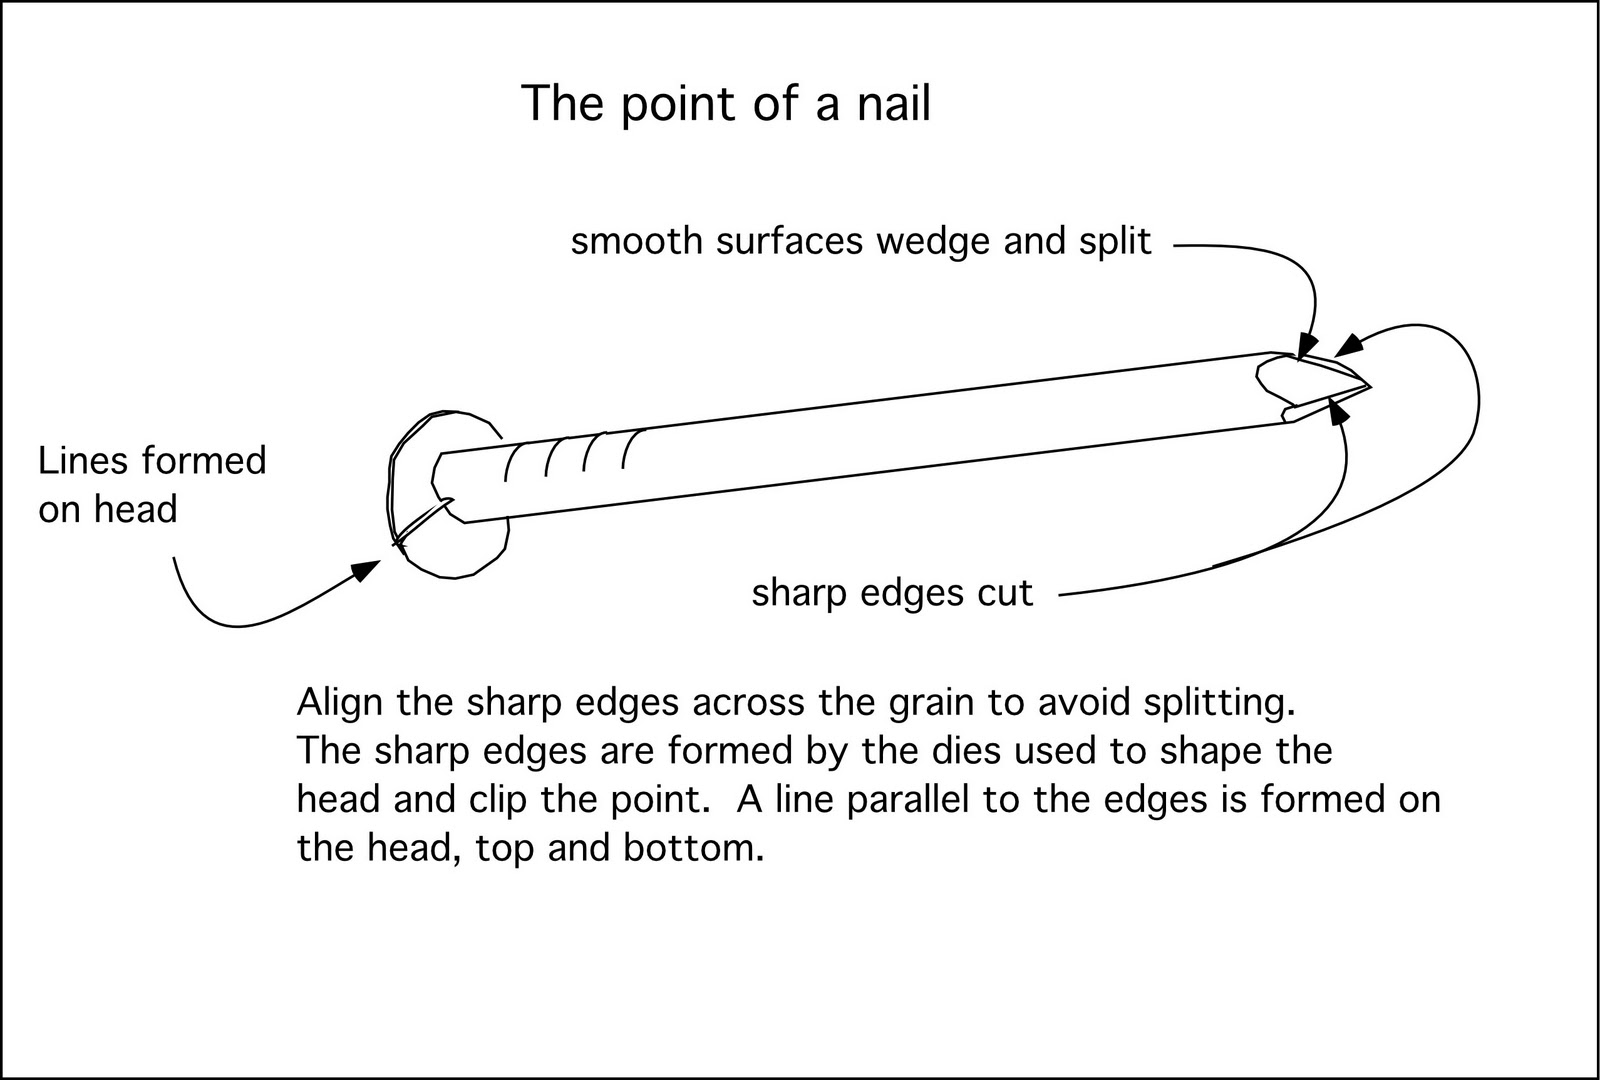
The drawing above is to illustrate an important point in the anatomy of a nail. Anyone who has actually tried to hammer nails will have learned that they can either bend as they are driven, or if poorly placed can split wood.
There is one little secret to nails that many of the finest carpenters will not know but that can keep you or your students from splitting wood. To make use of this secret requires close observation of each nail as it is positioned to drive into the wood.This lesson goes with the illustration above, and there are other fine points in the use of nails that can be discussed. While we tend to learn a few things over time without them necessarily entering the verbal domain, bringing ideas forward into language allows them to be shared with each other.
When nails are made, wire is pressed between two dies that form its head and point. The process leaves a small mark across the top of the head, and two sharp edges at the point on opposite sides and parallel to the mark on the head. These sharp edges when properly aligned cut into the grain, allow the nail to pierce the wood without splitting if the sharp edges are positioned at a 90 degree angle across the grain. If the nail is positioned so that these edges parallel the grain, the point of the nail works as a wedge splitting the wood.
On very small nails like those used by kids in woodworking projects, the line at the top, and the tiny edges require close scrutiny. The edges are also sharp enough that you can determine proper orientation by feel. Learning the value of close observation is one more thing that students can learn in wood shop. This can be presented as a lesson on the value of close observation. Students can test the theory themselves to see if the lesson is true.
Make, fix, create and share an understanding that we all learn best likewise.


Hi Doug,
ReplyDeleteOne of your subjects now is nails, so here's my two cents worth. I worked as a carpenter's helper for a short time years ago in Georgia where an old timer taught me to pound the points of nails somewhat flat to make them punch through the wood rather than wedge their way in. Works great for common nails, but for box nails which often bend when you do this, and especially near the end of a dry board, I clip the point off with side cutters to achieve the same result. Thanks for your advice to observe the markings on nails! jk
John, good to hear from you. Others had told me about dulling the tip of the nail. In fact, I think my dad had demonstrated that when I was a kid. That is very hard to do on small brads, and a needless chore on larger nails where the cutting edges are more easily noticed.
ReplyDeleteI'll have to try the side cutting pliers.
I hope to start woodworking with my preschool students, and am thrilled to have come across your blog. Thanks! www.mayapple.org
ReplyDelete